
- Small space
- If the ceiling is low ...
- Main
- "In the run"
- Diagonally
- "Chess"
- "Modular"
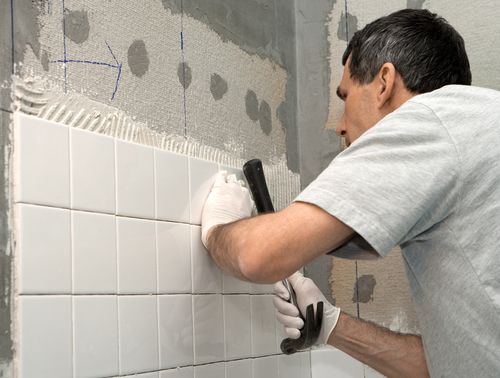
- Laying: description of the process for the floor
- Laying: process description for walls
- Grout
- Results
- What we pay attention to when choosing a material?
- 7 ways to tile
- Zoning in the bathroom
- Getting started in the bathroom
- Tile layout options
Thanks to today's variety of colors, sizes and textures of tiles, there are a large number of finishing options, each of which is different in its own way. As a result, each bathroom can be unique, especially attractive and comfortable. In many ways, this is also possible due to various styling techniques.
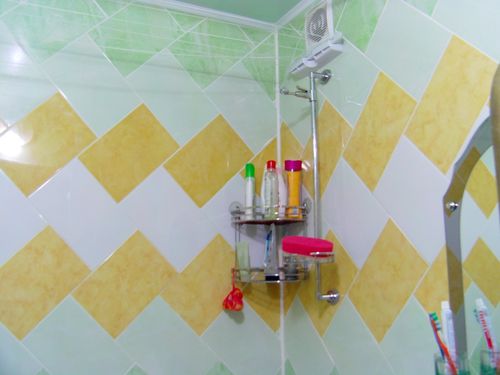
Small space
Given the small size of the vast majority of bathrooms in our country, important acquire methods that allow at least visually increase the limited space.
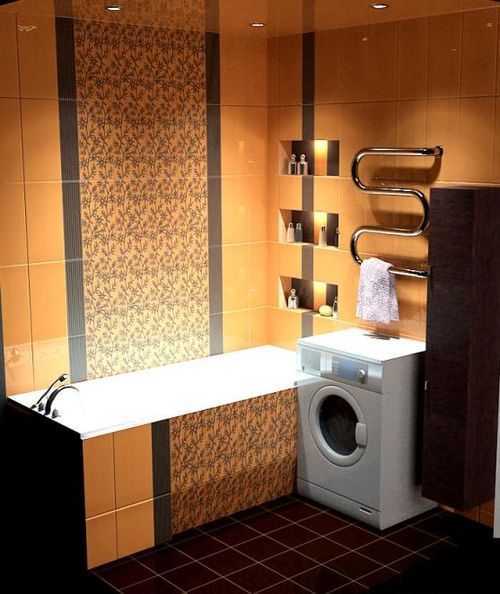
Therefore, to select a tile in this case, you should follow certain rules.
What will help to expand the room:
- pattern along the wall;
- glossy or small tiles;
- laying on a diagonal or horizontal rectangular tile;
- mosaic;
- cool, light tones.
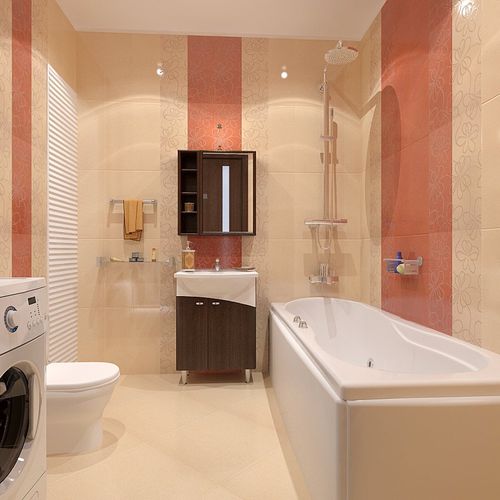
If the ceiling is low ...
Such a project further reduces the space. Therefore, it is necessary to apply solutions that will visually increase the height of the ceiling. To do this, use:
- eye level special inserts;
- ornament or "columns" in the corners;
- laying in a horizontal way.
Main
It is the most popular. In this case, the products are stacked so that the seams between the tiles are an extension of each other in the form of a straight line. We obtain a surface consisting of squares or rectangles - depending on the shape of the tile used.
Through the use of this method, material consumption will be minimal. Therefore, this method can be considered the most economical.
For small room this method is good if you use rectangular tiles which should be laid on the walls should be vertically. The floor can be trimmed with the traditional method and even square products.
"In the run"
Probably the second most popular option. “Runtime” is a good way to do with uncalibrated tiles - it allows you to hide defects.
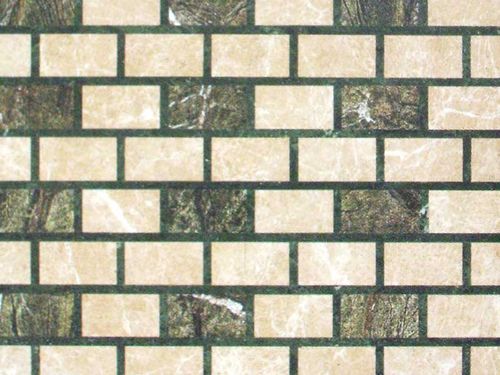
With this method, the layout resembles brickwork: there is an offset by half the width of the product of each row.
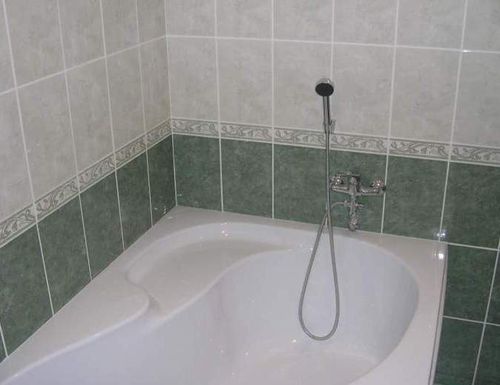
Diagonally
It is considered the most time-consuming process with a high consumption of material. However, in our case for the floor can be a good solution. Products located on the diagonal will help to visually expand the walls, making the space relatively large.
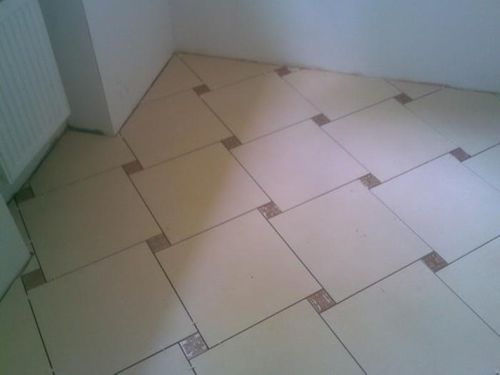
Can I use this method to finish the walls? Why not?!
In addition, it will allow you to hide the non-parallelism and non-perpendicularity of the walls, which in such conditions is also not uncommon.
But the result is an extraordinary pattern, especially if you harmoniously pick up products. However, the latter put forward increased demands on dimensional accuracy.
We reviewed the three most popular ways. Next, we will look into options that involve the use of two colors at once.
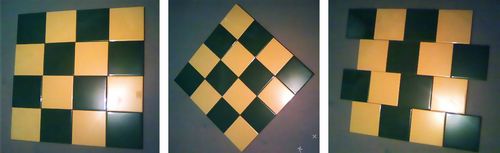
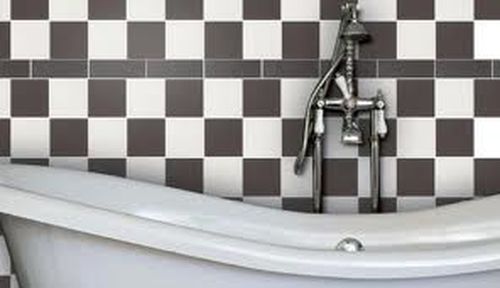
"Chess"
Is it possible to apply this method in our case? Yes it is possible. The main thing is to harmoniously pick colors. However, you should be careful when using this method on the floor and on walls in different color solutions . It may not seem harmonious.
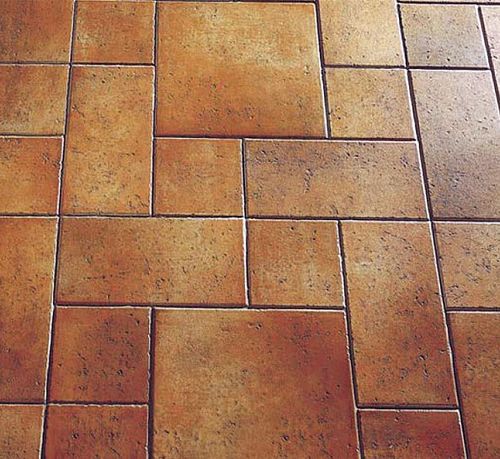
"Modular"
Difficult method that requires vigilance. But in the end you can get a boring picture. Tile should be the same texture, color, you can select contrasting options. Three tile sizes are also used, but with the condition that their sides will be multiple to each other.
Laying: description of the process for the floor
Having dealt with layouts, you can proceed to consider how to perform the styling. Let's start with the floor.
So first you need to prepare everything necessary materials and tools.
One has only to note that everything should be with a reserve, so that there is no need to postpone work.
Now you can do the preparation of the surface. From the floor you need to remove the old coating. If it is a tile, dismantle it together with the mortar. If linoleum - remove it.
Then the surface should be primed and dried. Since the procedure is performed in the bathroom, it is worth taking care of the installation of waterproofing materials. After this, priming is repeated. It should be noted that it is not recommended to turn a blind eye to irregularities, since this is fraught with subsequent defects. In addition, glue overruns. Therefore, it is important to approach this stage with all responsibility.
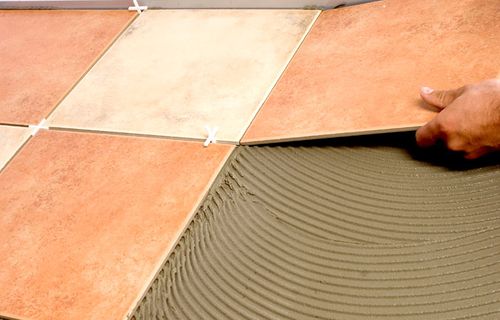
The procedure is performed starting at the far corner from the door. When designing the installation, it is necessary to take into account the location of objects, in particular the bath. It is important to take the first steps correctly, then further work will turn into mechanical, and not in search of a way out of the current situation.
So, put a layer of glue on the first tile with a spatula with teeth. Must remain uniform grooves. We put it, watching the horizontal position with the help of a level and focusing on the walls.
Remove excess glue immediately. So lay out a number. Between the tiles we keep uniform seams using plastic crosses. Joints must be cleaned of glue, so that you can then apply smooth grout.
Similarly, we lay out all the subsequent rows, taking into account the chosen method. Therefore, colors and patterns should be taken into account.
Laying: process description for walls
The same procedure is performed in the case of wall decoration. It all starts with the bottom row. If the floor is laid after the walls, then this row is passed, and start from the second. When the row is laid, you should wait a bit to dry the glue. And then you can continue laying rows.
Grout
The final stage is the mashing of the seams. It is necessary to choose a waterproof mixture of the desired color. This may be a finished composition or it will have to be diluted with water.
Apply the mixture with a rubber spatula. Excess should be removed immediately. And when the grout is dry, everything is cleaned with a damp sponge to get uniform seams.
Results
As you can see, in the procedure of laying tiles on the floor and the walls there is nothing difficult, but only when everything is well prepared, the layout is chosen correctly. And more about this you can see the video.
In our time, repair is an expensive pleasure, so everyone is trying to make it so high quality and beautiful that the interior of the room pleased for many years. If you want to update the room for water treatments, then it is useful to look at the photo options for tile layout in the bathroom. This will help determine the design of the room.
What we pay attention to when choosing a material?
Ceramic tile is deservedly the most popular finishing material for the bathroom. And it is not surprising, because it is not only distinguished by its aesthetic qualities, but also surpasses many analogues. The advantages of ceramic products include:
- resistance to dust, bacteria;
- ease of care;
- wide range of design;
- low conductivity, etc.
Today, the choice of tiles is so great that it is not difficult for an inexperienced person to become confused in all this diversity. Even without having special knowledge about this material, you should know the main indicators of its high quality. The most important technical characteristics are:
The degree of moisture absorption For the bathroom suitable material belonging to 1-3 groups. Representatives of other categories are more porous and are not suitable for rooms with high humidity. Resistance to chemical reagents The ability of a tile to resist chemical reactions is indicated in Latin letters. In our case, suitable material marked "AA". Purpose Tiles can only be used for floors or walls. In the first case, an icon with a palm is applied to the package, in the second case with a foot. For use in the home will be enough tile of the 2nd class of strength. Form, design It is necessary to choose, not only on the basis of their own preferences, but also taking into account the size of the room. The surface of the material can be matte or glossy.
7 ways to tile
Sometimes it's not so difficult to choose a material, how to decide how to use it.
Attention! The attractiveness of the wall and floor decoration depends not only on the design of the selected model range, but also on how its elements will be laid.
I would like to highlight the most common options for tile layouts in the bathroom, among which you will definitely find something to your liking.
The seam in the seam The most simple layout. Its essence is as follows - the orientation of all the rows is strictly straight and corresponds to the parallels of the room / geometric lines. To beat off the correct vertical, a building plumb is used; a square is needed to mark the horizontal lines. In this case, it is better to use square elements, but it is possible and rectangular, waste turns out a little. In the dressing This option is very similar to the brickwork, but it looks better when using a rectangular plate. Difficulties with the installation does not arise, but there are limitations. It is not recommended to use different too contrasting colors, because you get the impression of an uneven surface. Diagonal The main disadvantages are the complexity and high consumption of material. But the advantage is that using this option, you can correct deviating walls from the parallel or increase the limited space. Chess Very similar to the classic way of laying, the only difference is that two colors are used. Pretty popular and practical. Modular The process uses tiles of different formats, at least 3 sizes. This difference creates a dynamic pattern. You can make the ornament clearly sustained or add bright blotches on a monolithic surface, as well as randomly arranged. It is important to observe one rule - the size of the tiles must be multiples of each other and be from the same manufacturer. Linear Finishing elements required same size but different colors. Rows can be made intermittent, parallel, intersecting and they can pass absolutely in any places. This style is more like abstractionism. Ornamental To implement the method, a pattern of different colors is selected, the elements are laid out in a specific order. All this is made out a border. As for the pattern, it can be made in the form of a geometric pattern over the entire surface or in some particular area.
It is noteworthy that the basic layout of the tile in the bathroom can be used both on the walls and on the floor. There are several other ways, for example, "Herringbone", "Dialer" - they look like parquet.
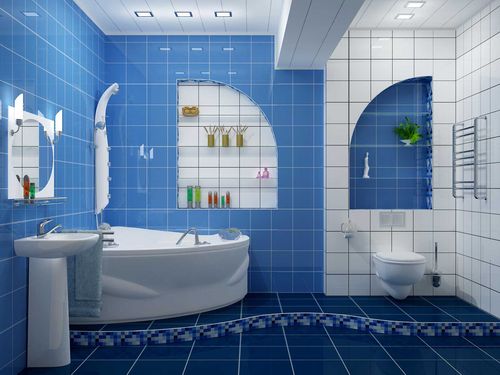
Zoning in the bathroom
In almost any apartment, zoning is a necessity, especially for rooms in which there is a free layout. Some options for tile layout in a small bathroom will help to cope with this task. Most often this is done using plates. different shades . As a basic design, you can choose a bright, juicy, contrasting tile, but you can, on the contrary, prefer any one tone. With the right approach, it’s quite realistic to create a whole composition. For example, you can make one of their walls of the same color as flooring on which the bath is installed.

If your bathroom provides an expensive plumbing, then you can install it on the tile, which was used in the cladding. With this approach, you can select almost any element of the interior, which, in your opinion, is worthy of attention.
By the way, speaking of, experts recommend choosing a small tile for her in gentle colors. A mosaic that visually expands the space will look good. If you want the room to be bright, then it is better to choose just light tile as the main one and combine it with rich elements. Remember, light tones always increase the space, and dark tones - on the contrary. Helps to cope with this task mirror plate.
If you have decided on the option of laying, then it is better to get acquainted with the thematic video instruction.
Bathroom - one of the most important rooms in the house. This is where we spend a lot of time. We come here for relaxation or a charge of vivacity. No matter what size or area the bathroom has. The main thing is that it is comfortable, functional and beautiful. And if the location of the plumbing or the layout of the room can hardly be something to do even within overhaul , to make a beautiful and modern bathroom is quite capable of every owner of the house - the correct tile layout in the bathroom will help you.
Original tile layout in the bathroom
Traditionally, bathroom interiors are tiled. Why precisely tile? It is durable, easy to install, not afraid of moisture. The tile can be washed and cleaned using chemical and abrasive agents, it is durable, practical and a certain tile layout in the bathroom allows you to completely transform the interior design of the bathroom in a fairly short time, as can be seen in the photo of the tiles laid in the bathroom.
Getting started in the bathroom
Planning to upgrade the bathroom? Start by estimating it. repair work . Laying tile in the bathroom will be a stage that will be realized in the future. For example, determine whether the plumbing, heating elements, and wiring will be replaced with the tile. Such additional costs can significantly increase the total cost of repairs.
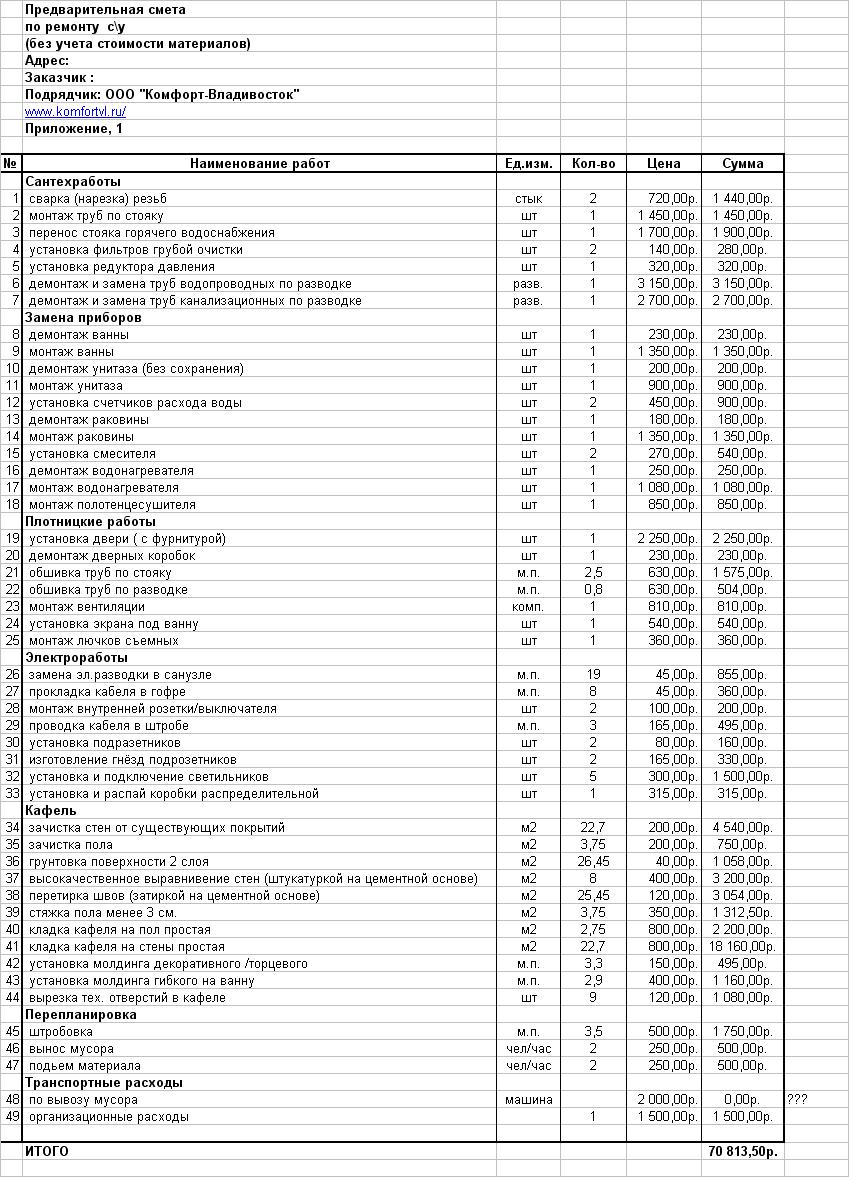
In the preparation of estimates, when you plan to repair or layout of tiles in the bathroom, you should consider:
- The average cost of materials and the volume in which they will be purchased;
- The cost of the work on the walls. If you do not plan to arrange the tile tile in the bathroom by yourself - check the prices for this type of work in your city;
- Possible additional costs. Dismantling the old coating, leveling the surface of the walls, applying waterproofing and soil also require certain financial costs. And it is better to take them into account in advance.
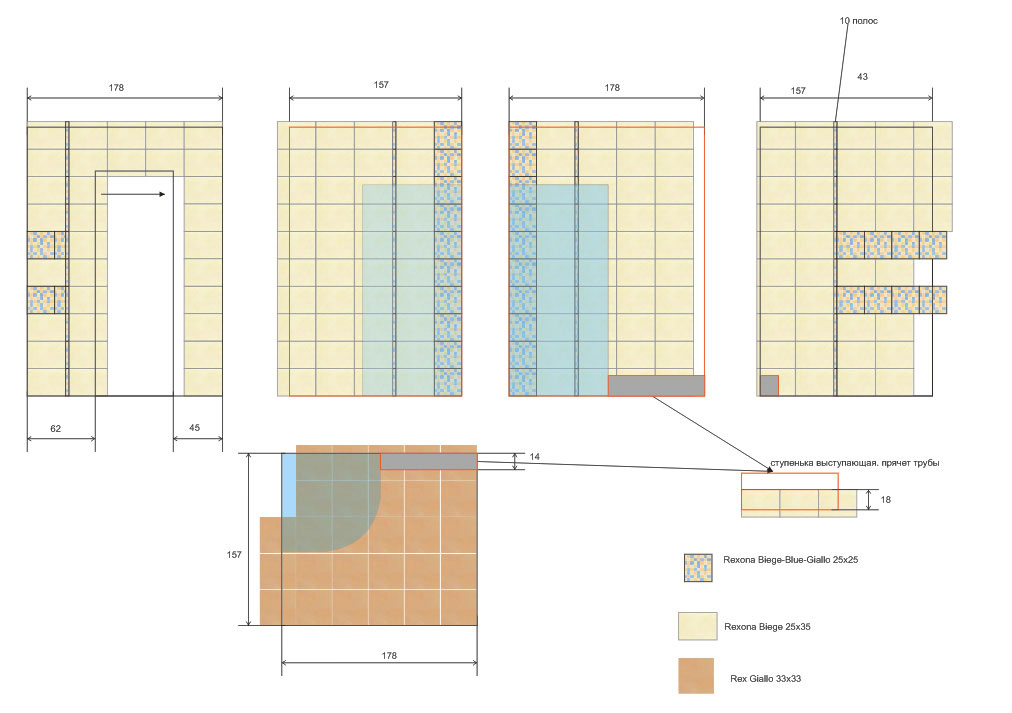
Upon completion of budgeting, it is necessary to draw up a plan for tile layouts in the bathroom, with which it will be possible to determine the type of layout of the material on the wall surface.
This can be done with the help of special computer programs or manually - with the help of pencils and paper. By the same principle, you can "try on" any wall decoration, determine the colors or the location of the pattern on the wall surface. Proper tile layout in the bathroom is sure to perform all its functions.
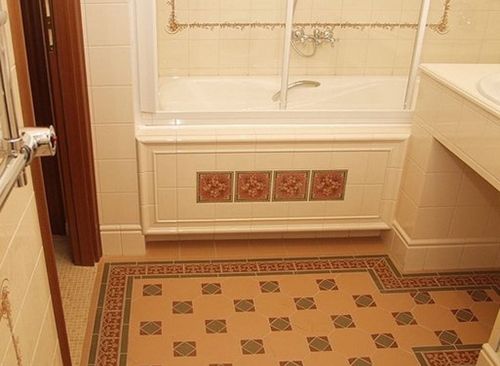
Tile layout options
Consider some of the rules for tile layout in the bathroom. There are quite a lot of decorative techniques used in the design of a tile. For example, you can go according to the classical scheme, laying the lower part of the wall with tiles to match the floor, and the upper one to more light colors by dividing the border by border color. And you can choose more expressive layouts ceramic tiles in the bathroom. For example, choose the same texture, but contrasting color tiles for walls and ceilings. Or make a tile layout in the bathroom of a single color, but create bright accent on one of the walls (in the form of a strip of contrasting color or a bright panel).
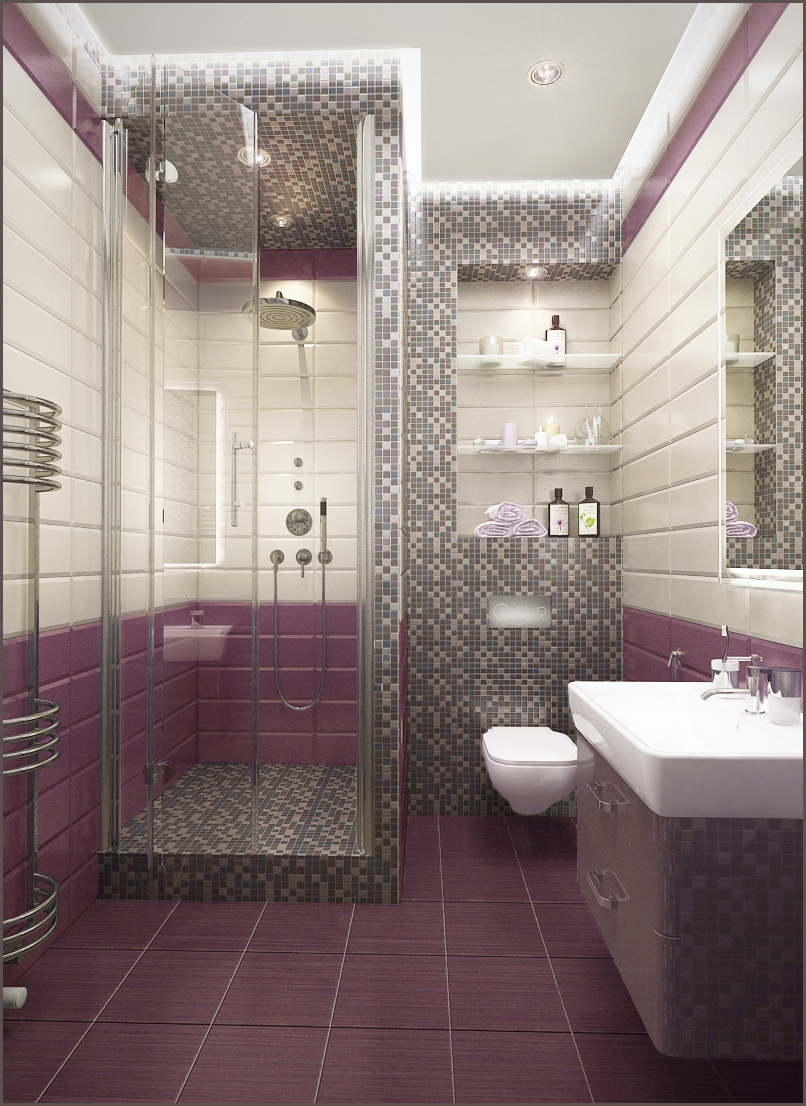
And what to do if you plan to trim a small area with a tile, if the layout of a tile in a bathroom is calculated for a small area? Here interior designers have their own tricks. For example, the glossy shine of the surface allows smoothing the boundaries of space. And white, green, beige tones allow you to make the room visually wider than it actually is. Also works on the expansion of the boundaries of space diagonal display tiles in the bathroom.
Visually, you can stretch the room, using such an option as a vertical tile layout in the bathroom, placing the ornament at the height of human growth, leaving the lower part of the masonry monotonous. Reduce the height - with the help of horizontal layout and large elements in the decoration.
Whichever pattern of tile installation in the bathroom is chosen, - be guided, first of all, by your own taste preferences. After all, the layout tile in the bathroom should create an atmosphere of comfort, comfort and peace. And only then follow the fashion trends or recommendations of designers.
Photo and video materials on the tile layout in the bathroom will help you determine the right option.
Can I use this method to finish the walls?Why not?
What we pay attention to when choosing a material?
Why precisely tile?
And what to do if you plan to trim a small area with a tile, if the layout of a tile in a bathroom is calculated for a small area?